The use of solar power is increasing day by day. Solar systems are now much cheaper than before. This will save your electricity costs. At present solar power is being used a lot in villages and cities. However, solar power is very important in the villages where electricity has not yet reached. Moreover, solar home systems will come in handy in remote areas of the island and hills where there is no electricity facility. Solar electricity is being used to provide drinking water using water pumps. Using this system on launches, steamers and ships can save the cost of dynamo oil. Many countries in the world are now leaning towards solar home systems. It is in demand in the developed world as well as in the developing world. The use of solar systems as renewable energy is increasing. Moreover, once you install this system, you will get free electricity year after year. Those who have electricity can also install solar systems to reduce electricity consumption. Moreover, it will come in handy during load shedding. This is also good for our environment. There is no alternative to using solar power for sustainable development. Once you invest, you will get the benefits year after year. Maintenance costs are very low. A logical decision of today can make a positive difference in the days to come. So if you have the minimum financial capacity, it is better not to delay installing solar home system.
Today I will describe the strategy of how to install your home solar system.
Solar systems are very easy to install. For this you need to have basic knowledge about electricity. Below is a description of how to easily install it yourself without an electrician. If you have basic knowledge about electricity, you can install a solar home system yourself.
Home Solar System Accessories:
1) An 60Ah battery
2) A 100W solar panel
3) A charge controller
4) Panel
4) Solar cable
5) Two 12V solar lights
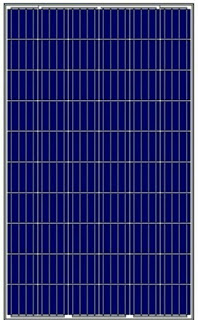
There are two types of solar panels. Namely: 1) Polycrystalline and 2) Monocrystalline. The difference between poly and mono is not much. However, you may prefer monocrystalline. Because monocrystalline is 20% extra charged compared to polycrystalline. Again the price of monocrystalline is a little higher. Polycrystalline is blue and monocrystalline is black.
Equipment required: 1 pliers, 1 screwdriver, tap etc.
# 1 First install the solar panel on the roof of your home. To do this, open the junction box at the back of the panel. There are plus and minus points. Connect the head of the black wire to minus and the head of the red wire to the plus. Then place the panel in such a way that it is at a 90 degree angle. If the roof is flat, you need not use the frame with panel. Below are the poly and monocrystalline:
# 2 Connect
the solar panel to its charge controller.
# 3 Connect the battery with the controller. In this case, add the minus of the controller with the minus of the battery first. Then add the plus.
Note: The battery, panel and load point of use in the controller are different. Look carefully and add the line carefully. Otherwise, if you make a mistake, the system will not work anymore.
Maintenance:
Stop using as soon as the controller signals low battery. Otherwise the complete discharge may damage the battery.
If the water goes below the specified label, the battery should be watered from time to time. The distilled water of the battery is available to buy in the market. You can buy 2 liters to 10 liters of water. Try to keep the holes in the battery caps's free.
In winter or dry season dust on the panel can reduce power generation up to 20%. If possible, clean the panel surface.
My system is enough to charge laptop, mobile, light, DC fan, etc. You will need to use a 500 watt DC to AC inverter to charge laptops, mobiles, etc.
If you need more charge, you can connect more batteries and panels in parallel.


0 Comments